Showing posts with label nail polish. Show all posts

Saturday, April 26, 2014

Musical Notes Nail art


Hello!!

This is a simple and classic design which works well on medium to long nails!


All you need are two colours and you're ready to go :)

Procedure

Step 1
:  Apply a base coat to prevent your nails from staining and for a  nice smooth base to paint on.

Step 2 : Apply a white base on al your nails, you could also try it out with other colour combinations and jazz it up a bit.


Step 3 : Draw a few parallel lines on all your nails, depending on your nail length you can vary the number of lines you can fit. Skip this on your middle finger ( you can also keep your ring finger as your accent nail), you could also change the direction of the lines, or keep it the same on all your nails.


Step 4 : Now draw on some musical notes on the parallel lines with some pictures as reference.

Step 5 : On your accent nail, paint on the Treble clef symbol and a few dots(optional).

Step 6 : Finally, finish it off with some top coat and you're done !

அபிநயா <3


Enhanced by Zemanta

Saturday, November 17, 2012

One stroke acrylic paint design

Hey !! After a loooong time I finally sat down and did a new nail art..

I've been wanting to try out the one stroke manicures for a long time, but i could never find the right sized brush. Now I finally got a small flat end brush and decided to try it out .


The paint was a little watery, so the colours weren't so opaque in one coat, i havd to go over the flowers again to make them visible.


I did the flower only on my thumb and middle finger, cause they are wider and have more space, so it;s easier to paint the flowers.

One the remaining nails I just did one stroke leaves. I used red and white for the flowers, and green and yellow for the leaves. as usual a base coat and top coat, i painted my base black to make the flowers stand out more.


அபிநயா <3

Enhanced by Zemanta

Monday, October 15, 2012

Gold and black nail art

Bad news, I locked my box of nail polishes and now I'm not able to open it :-/ Left with only a few I had outside.


I did this nail art with this beautiful gold polish I got, since the rest are stuck inside and did the design on it with some black eye liner and a thin brush... I hadn't applied the top coat yet, hence the dried black eye liner design looks matte.


The eyeliner has to be dry before you apply the top coat , otherwise it rubs away when you paint over it. Also apply it quickly in quick few strokes.


Enhanced by Zemanta

Friday, September 28, 2012

BLING YOUR NAILS


Hey everyone!!

Bling out your nails to create the ultimate fun and sparkly nails!! They are so  easy and so fun to do!!


PROCEDURE :


Step 1  : Apply a base coat to protect your nails and prevent them from staining.

Step 2  : Apply 2 coats of a silver (or gold if you want) nail polish, and before it dries, quickly place rhinestones of different colour or same colour as per your choice all over your nails.


Step 3  : Finish off with a very good top coat to protect your designs and prevent the stones from falling off.
Ant that's it.. you're ready to rock those nails!!

Here's a picture of my nails taken in sunlight without any editing :


TIP :  To remove this design, i suggest you apply some nail polish remover on cotton and press on your nails for some time, then once the nail polish has softened a little, pick out the stones manually, and then wipe off the remaining polish with some remover.


Enhanced by Zemanta

Sunday, September 16, 2012

Fiery Hot Nail Art


Hey!! This hot nail art is really easy and quick to do, and looks incredible.

You can of course, use other colour of your choices, I loved the way these two colours complemented each other.


Procedure  :

Step 1  : Apply a base coat to prevent your nails from staining and also to protect them. I once applied this orange without a base coat and when I removed it, all my nails had turned orange and looked horrible.

Step 2  : Apply two coats of a pastel orange nail polish on all yous nails and let them dry.


Step 3  : With a reddish pink nail striper, or using a thin brush, paint on some thin stripes, radiating from the bottom right corner of your nails. Make sure each stripe tapers towards the end.

Step 4  : Take a silver glitter polish and dab on lightly at the corner alone, and also apply a red rhinestone while the polish is still wet.

Step 6  : Finally apply a layer of top coat to seal it all in, and you're done !!


Enhanced by Zemanta

Saturday, August 4, 2012

Marbling without water

Hey everyone !!

I tried doing water marbling for a change but it didnt come out so well... so i decided to do it my way

You dont need water, tapes or any patience, just get a couple of colours of nail polishes, a toothpick and your ready !!


Procedure :

Step 1  :  Apply a base coat to prevent your nails from staining and protect them.

Step 2  : Take 2 or 3 of your favourite colour, they can either be different shades of the same colour like I've done here, or you can chose different colours.

Step 3  : Place 1 or blobs of the different colours on your nail, work on one nail at a time for this nail art.

Step 4  : Quickly using the toothpick, swirl the colour together, make sure you dont mix them too much, you want the individual colours to show through.

                                                              Source: Uploaded by user via M Abi on Pinterest

Step 5  : Since we've used a thick layer of nail polish, let it dry completely before you proceed. You can stop with this and add a top coat, or you can follow the additional steps.
Step 6  : I've added a layer of silver glitter polish , and placed a few stars to glam it up , but this is optional. You can add whatever you want, without overdoing it thereby loosing the marbling effect underneath.

Step 7  : Finish off with a top coat and your design's complete!! :)


                                           Source:
Uploaded by user via M Abi on Pinterest

Sunday, July 22, 2012

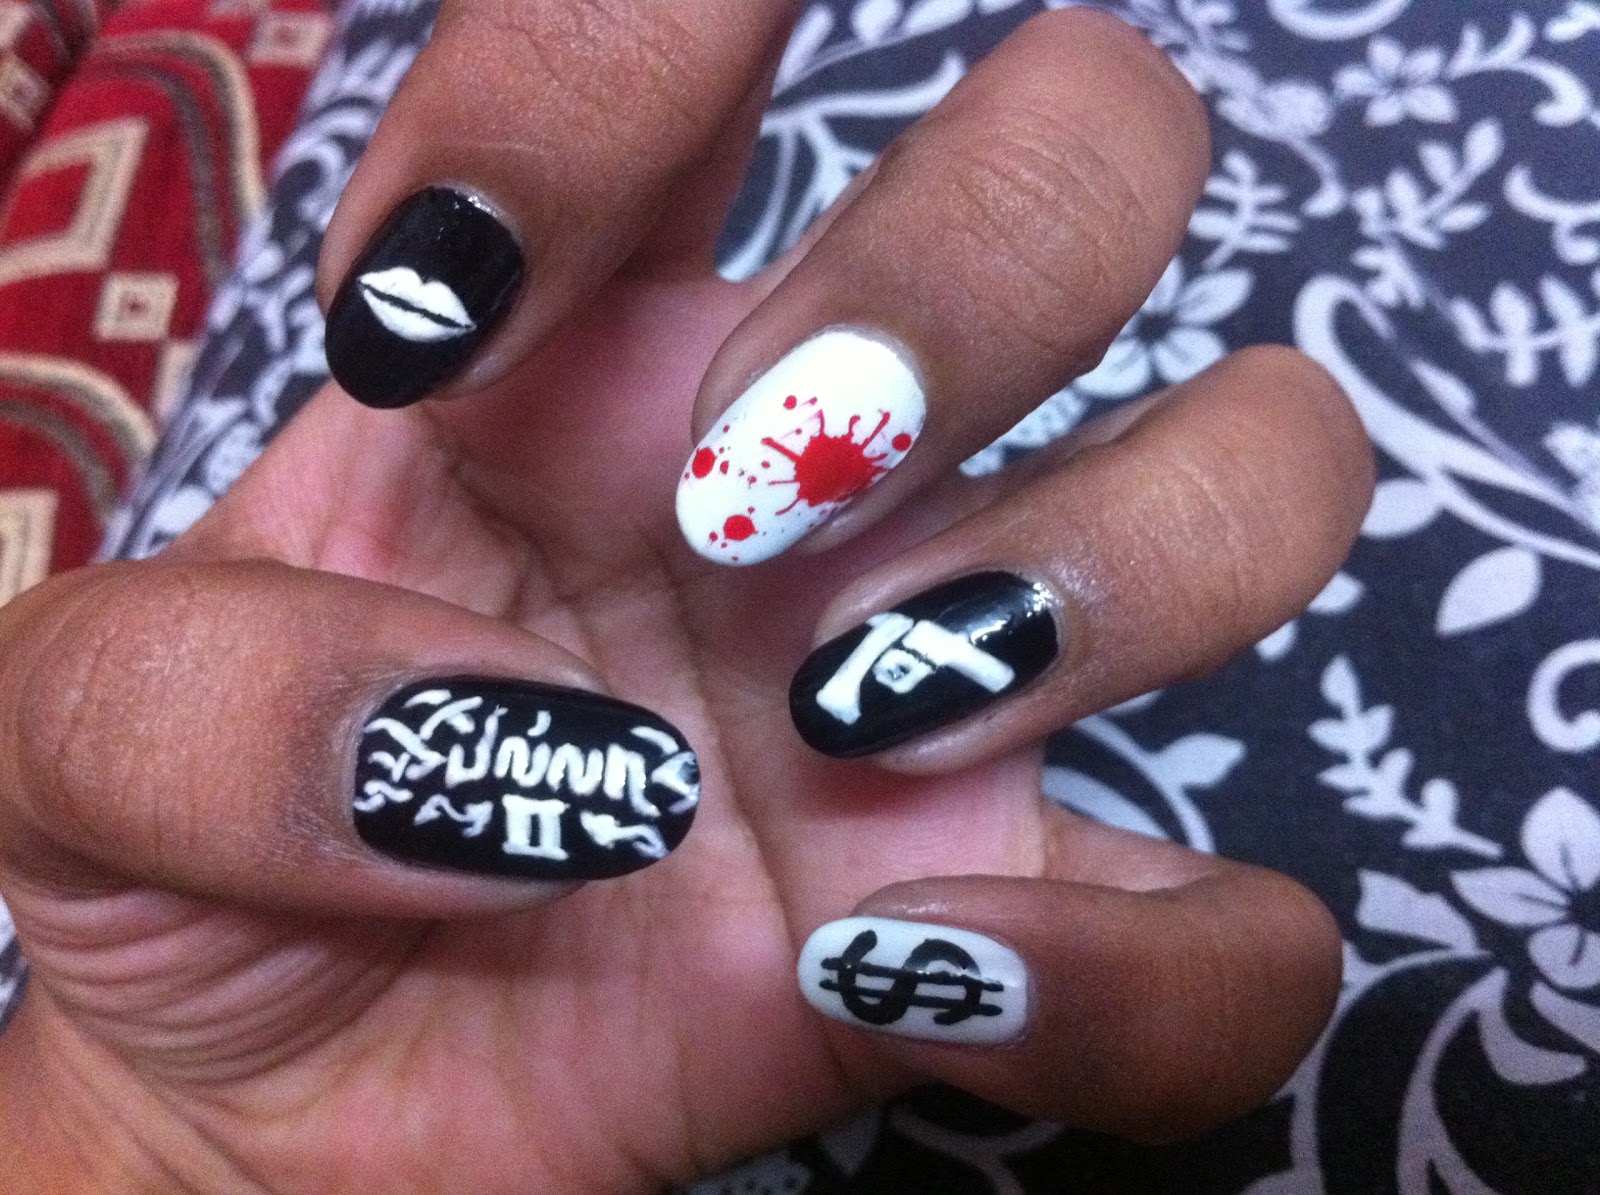
BILLA 2 !!!

To all my Tamil friends out there, are you an Ajith (Thala ) fan??? If you are, then this is the design for you!!


I don't think i can actually type the steps on how to do it, but you can try your own creations based on this nail art :)

I applied alternating black and white base for the nails, and did all the designs (except the middle finger) using acrylic paint.


I did the main Billa logo on my thumb. My thumb nail recently broke :( so I wasn't able to complete the design on the right side. I suggest you apply a clear coat before painting using white acrylic on black nails, coz over time the white mixes with the black and makes it a sort of grey.


For the fore finger, i painted on the lips using white acrylic. You can also use konad stamping , but i just felt this looked better.

The middle finger was done using konad stamping kit with Red on a white base to form a sort of splattered blood effect.

The gun design was inspired by the gun at the end of  007 (James bond style ;) )

And finally, what's a don without some money?? I just painted it on a white base using black acrylic.

Any doubts, feel free to comment below :)


Hope you liked the design and even more the movie .. Coz i thought it was fantastic!! :D


En nanbana iruka thaguthi venam, aana ethiriya iruka kandipa thaguthi venum !!


Friday, July 13, 2012

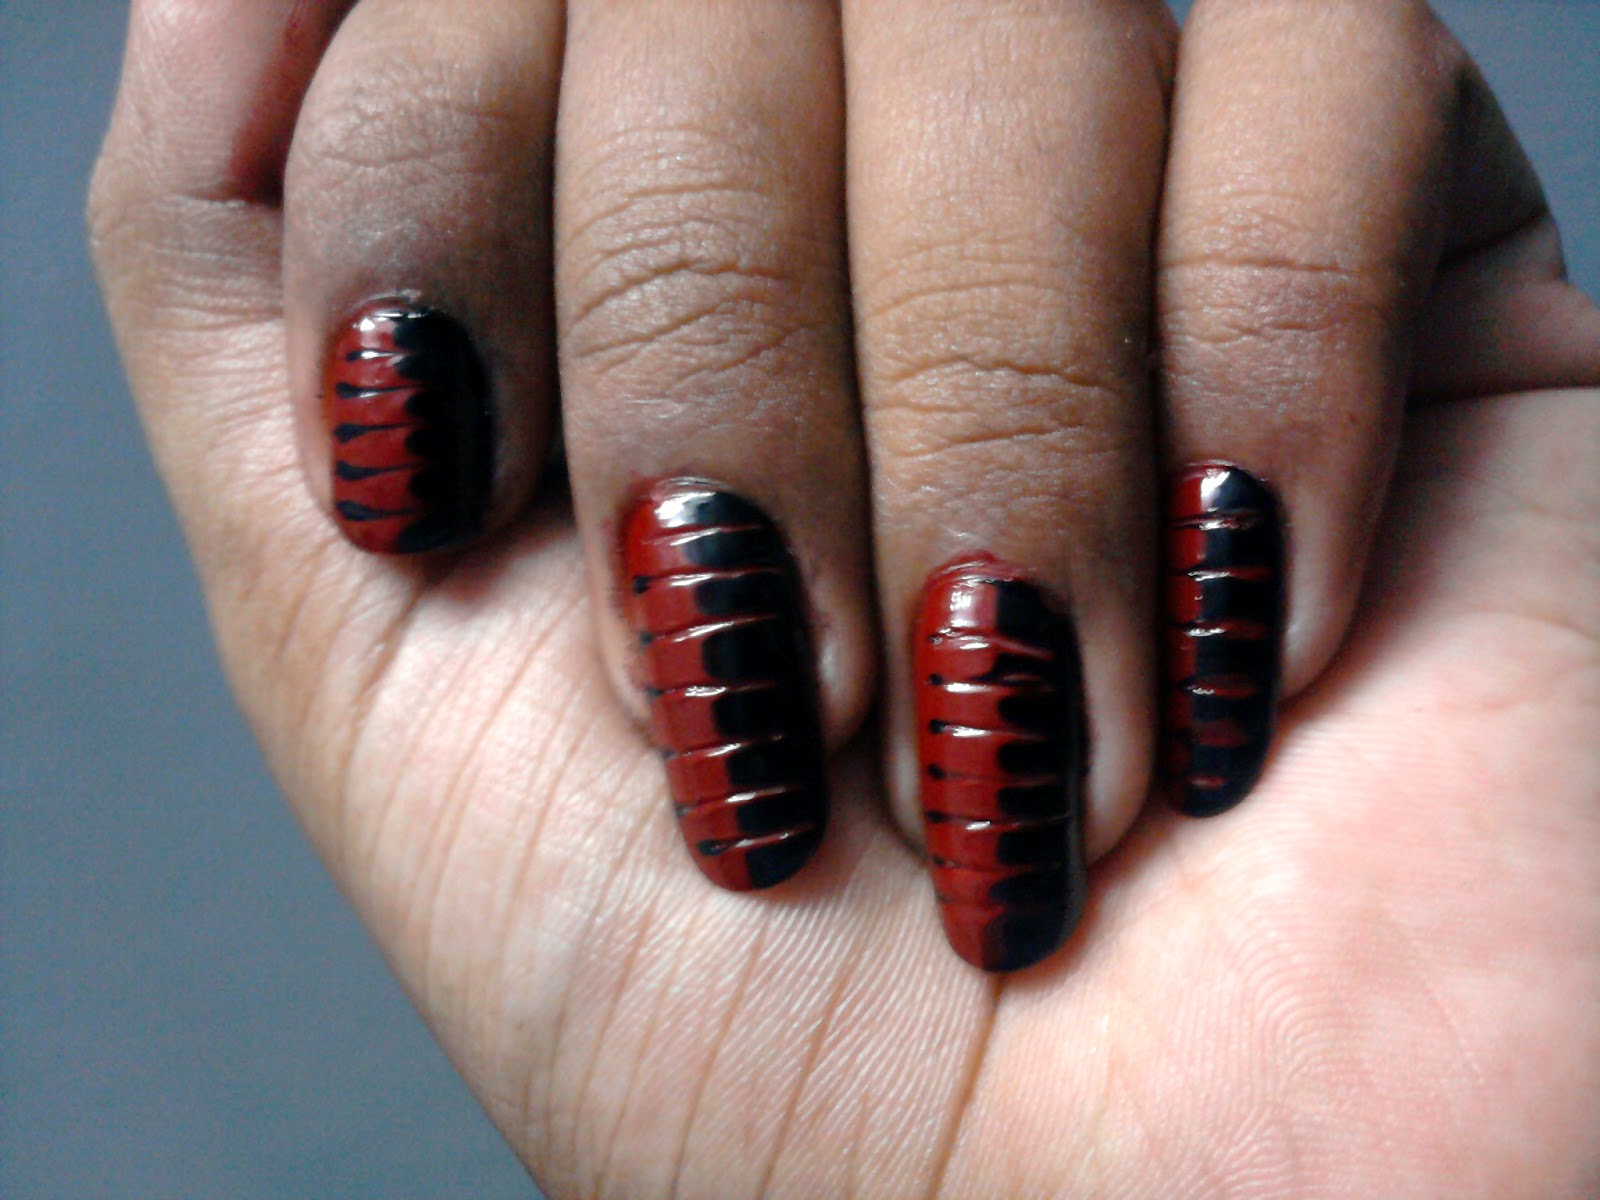
Red and Black Drag nail art

Hey everyone!! Ever wanted to do a quick and easy design???

Can be done on short or long nails!!

Then this is the one for you!! Simple, easy and quick to do!! Here's how :D


                                           Source: Uploaded by user via M Abi on Pinterest


Procedure :


Step 1  : Apply a base coat to protect your nails and prevent them from staining.

Step 2  : Apply red to half your nail, and black to the other half and let it dry for a few minutes. We do this step because when we drag the nail polish polish, we don't want our nail to show through.

Step 3  : Now , apply a slightly thicker coat of red and black to the respective halves of your nails and before it dries, quickly, using a needle, drag the nail polish from the red to the black horizantally to form stripes.


Step 4  : Repeat the same process to all the nails, and let it dry. This will take some time since we have applied a thick coat of nail polish.

Step 5  : Finally apply a layer of top coat to seal your design and your done !! :)

Alternative : If you have long nails, you can try doing it only on your tips for a unique French tip , or you could  try dragging from both sides , it's all up to you!!


Sunday, July 1, 2012

Patchwork Abstract Nail Art

Have a multi-coloured dress and need colourful nails to match them???


Here's the design for you!!

Keep these colours as they are or change them around as you wish :)


Procedure  :

Step 1  : Apply a base coat to protect your nails and prevent them from staining.

Step 2  : Apply the lightest colour as the base on all your nails.

Step 3  : Take a a piece cellophane tape, stick it several time on your arm and peel off to reduce it's stickiness.

Step 4  : Now, make sure the base coat is completely dry before youapply the tape along one diagonal.

Step 5  : Now apply the darkest colour on the area not covered by the tape.


Step 6  : After the paint is partially dry, remove the tape. Let the colour dry completely.

Step 7  : Now again take another piece of tape, reduce it's stickiness and apply it along the opposite diagonal.

Step 8  : Fill the uncovered area with the medium dark colour. After the polish is partially dry, remove the tape.

NOTE : For those of you with a steady hand, you can try doing it without the tape and with a thinner brush.
Also you can do the medium dark colour using tape, and fill the darkest colour with a thinner brush.
You can change the colours as required, they dont necessarily have to be different shades of the same colour.


Step 9  : Using the lightest colour and a dotting tool (or the end of a bobby pin) place some dots on the medium dark coloured area.

Step 10  : Finally, with a thin brush and black nail polish or acrylic paint, draw some short lines at the junctions of the colours to form the stitches.

Step 11  : Finish off with a top coat to seal in your beautiful design :)


Here is a different version of it using 4 colours, and without the dots and stitches.


Saturday, June 30, 2012

Silver flower Nail Art

For all those beginners out there, this is the design for you!

Can be worn on noth short and long nails :)

Extremely simple yet oh so elegant, no one would believe it was your first attempt !!


Procedure  :

Step 1  :  Apply a base coat to protect your nails and prevent them from staining.

Step 2  : Apply a your favourite colour to all your nails to form the background for your silver flower.

Step 3  : Take a silver nail polish or acrylic paint and place three dots in a curve at the base of your nail at a corner.

Step 4  : Before it dries, quickly, with a toothpick, press and drag on the dot toward the corner to create a petal (tear drop) shape.

Step 5 : Repeat the same for the remaining 2 dots and on all your nails.

Step 6  : For an extra touch of glamour, you can sprinkle some glitter over it while the paint is still dry, but remember, this can get quiet messy and do not try if your in a hurry.

Step 7  : Next apply some clear polish at the corner of your nail, in the middle of your pflower and place a matching rhinestone.

Step 8  : Finally apply a layer of top coat to seal in your design and the rhinestone.

NOTE : For those of you with long nails, you can even add another flower on he opposite corner to fill in the empty space :)


Cute Puppy Face Nail Art

This is a cute and unique nail design which is sure to make people take a second look at it!!

It's super cute and super easy!! Here's how :


PROCEDURE :

Step 1  : Apply a bsae coat to protect your nails and to prevent them from staining

Step 2  : Paint 2 coats of the colour you want your puppy to be.

Step 3  : On your fore finger and pinky, draw 3 short lines for the whiskers.

Step 4  : On your middle finger and ring finger, draw 2 semi-circular shapes in white (nail polish or acrylic). Make sure that they are painted towards each other.

Step 5  : Now using a black polish or acrylic paint, paint smaller semi-circles in side them, and also draw the outline for the white semi-circle to define the eyes. An alternative way to do this would be to first draw a slightly  larger semicircle of black, underneath the the white one, to form the outline.

Step 6  : Now place two tiny white dots in the black semi circles for the highlights in the eyes.


Step 7  : Now for your thumb, work on it horizontally.

Step 8  : Paint a small triangle in pink for the nose.

Step 9  : Next, outline the nose with black and draw two curved lines for the mouth. Using a toothpick, place a few dots around the mouth and nose.

Step 10  : And thats it!! Finish off with a top coat to seal your design :)