Showing posts with label red. Show all posts

Sunday, September 16, 2012

Fiery Hot Nail Art


Hey!! This hot nail art is really easy and quick to do, and looks incredible.

You can of course, use other colour of your choices, I loved the way these two colours complemented each other.


Procedure  :

Step 1  : Apply a base coat to prevent your nails from staining and also to protect them. I once applied this orange without a base coat and when I removed it, all my nails had turned orange and looked horrible.

Step 2  : Apply two coats of a pastel orange nail polish on all yous nails and let them dry.


Step 3  : With a reddish pink nail striper, or using a thin brush, paint on some thin stripes, radiating from the bottom right corner of your nails. Make sure each stripe tapers towards the end.

Step 4  : Take a silver glitter polish and dab on lightly at the corner alone, and also apply a red rhinestone while the polish is still wet.

Step 6  : Finally apply a layer of top coat to seal it all in, and you're done !!


Enhanced by Zemanta

Sunday, September 2, 2012

Spiral Nail Art


Hey everyone... This is a short and quick nail art and can be done easily on short or long nails


All you need for this nail art is a base colour and a nail art pen in a diferent colour.The colour can be contrasting, or different shades of the same colour.

If you dont have a nail art pen, you can try this with your nail art brush, but you might need to be steady and careful. So here's the procedure :)


PROCEDURE :

Step 1  : Apply a base coat to protect your nails and also to prevent them from staining.

Step 2  : Apply 2 layers of the nail polish in your desired colour.

Step 3  : Using a nail art pen or brush, care draw a small spiral at the bottom corner of your nail.

Step 4  : Draw a slightly larger spiral next to it, going in the opposite direction. If you have short nails, you can stop at this, for longer nails, continue with the steps below.

Step 5  : Draw two curvy lines as shown in the pictue on the opposite corner of your nails.

Step 6   :If required , fill in the gap between the lines with a glitter polish and add some stones.

Step 7  : Finish off with a final layer of top coat to protect the design. That's it :)


Friday, July 13, 2012

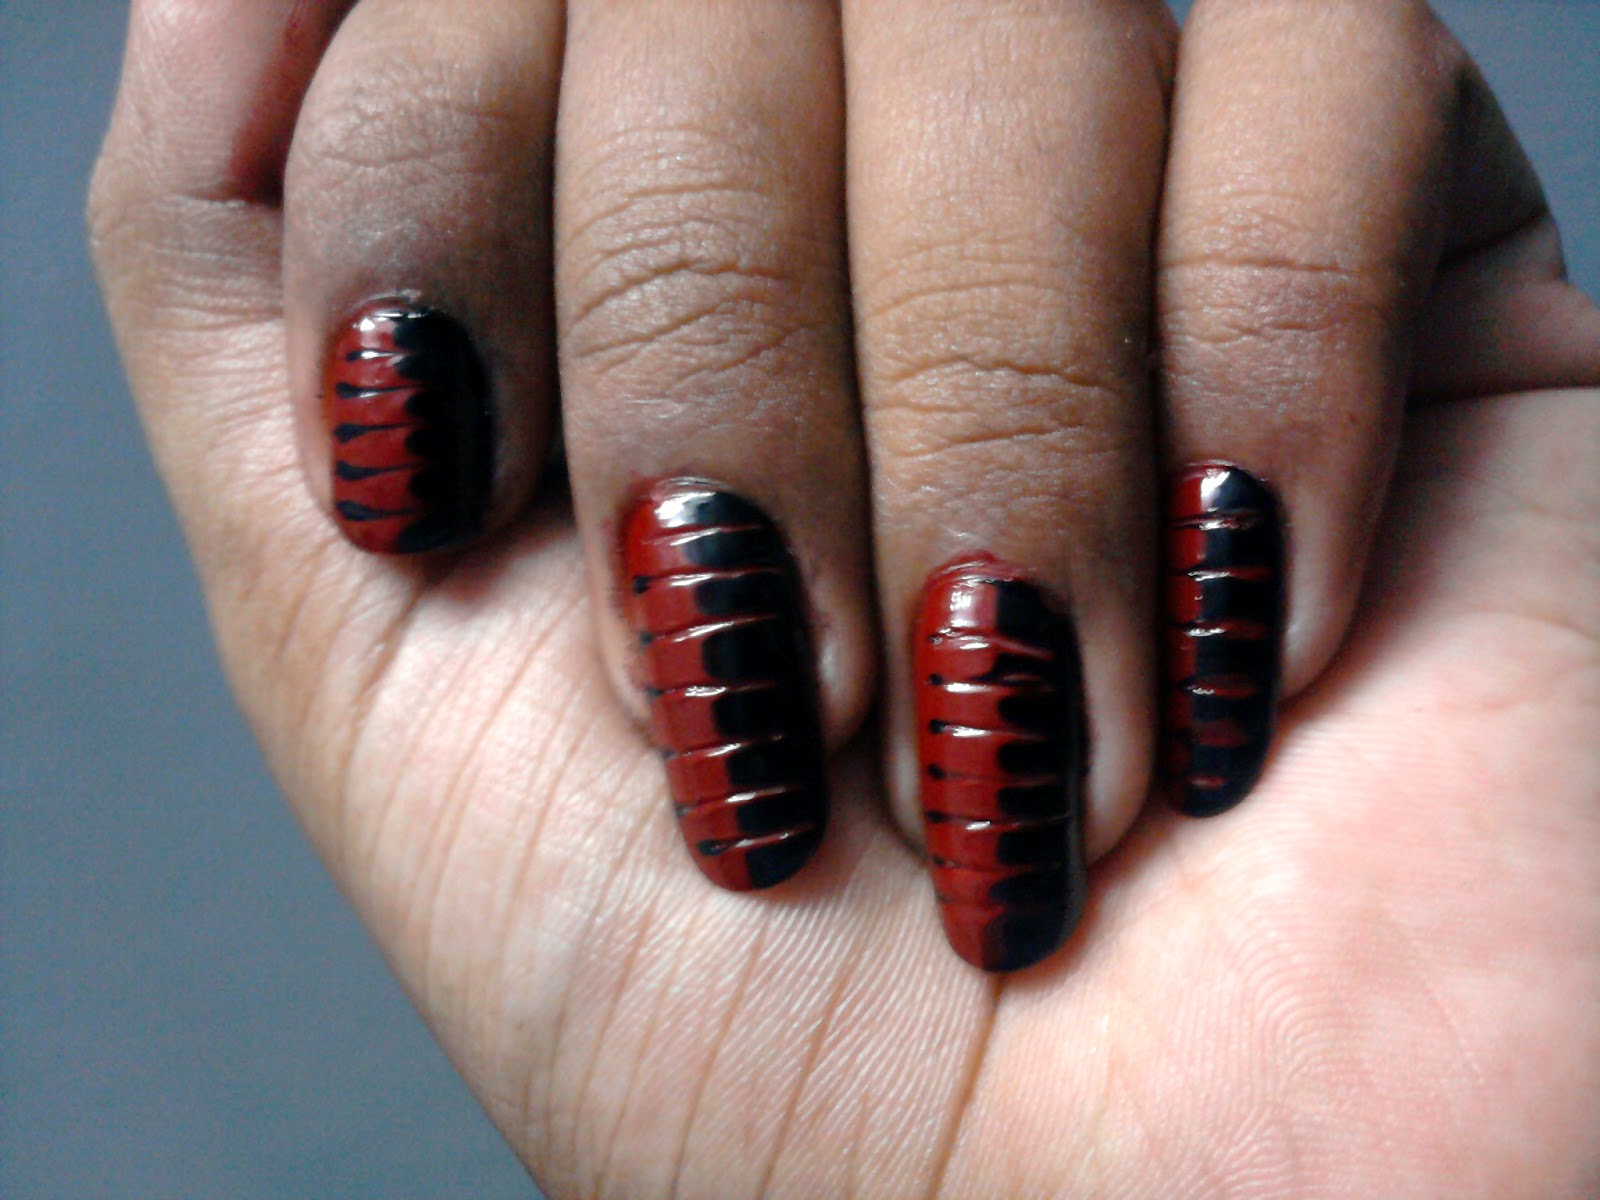
Red and Black Drag nail art

Hey everyone!! Ever wanted to do a quick and easy design???

Can be done on short or long nails!!

Then this is the one for you!! Simple, easy and quick to do!! Here's how :D


                                           Source: Uploaded by user via M Abi on Pinterest


Procedure :


Step 1  : Apply a base coat to protect your nails and prevent them from staining.

Step 2  : Apply red to half your nail, and black to the other half and let it dry for a few minutes. We do this step because when we drag the nail polish polish, we don't want our nail to show through.

Step 3  : Now , apply a slightly thicker coat of red and black to the respective halves of your nails and before it dries, quickly, using a needle, drag the nail polish from the red to the black horizantally to form stripes.


Step 4  : Repeat the same process to all the nails, and let it dry. This will take some time since we have applied a thick coat of nail polish.

Step 5  : Finally apply a layer of top coat to seal your design and your done !! :)

Alternative : If you have long nails, you can try doing it only on your tips for a unique French tip , or you could  try dragging from both sides , it's all up to you!!


Saturday, June 23, 2012

Red and gold ethnic nail art

This gorgeous design can be worn for any traditional events for that extra perfect hands!!

Procedure : 

Step 1  : Apply a base coat to protect your nails and prevent them from staining.

Step 2  : Apply a 2 coats of a rich red coloured nail polish on all your nails.

Step 3  : After the red has dried, take some gold nail polish or acrylic paint and using a thin brush, draw the design as shown.

Step 4  : Then, using a gold sparkle, go over the central swirl design alone.

Step 5  : Apply a top coat and your done!!


Alternative :

On the thumb, you can do a different design as shown:


Step 1  : Apply red in 2 circular motions along the edge.

Step 2  : Using the same gold colour and a thin brush, draw the 2 curved lines

Step 3  : Now using a black polish or acrylic paint, draw the design in the blank area of your nail.

Step 4  : Finish off with a top coat :)


Friday, June 15, 2012

Pizza Hut logo Nail Art

Have the Pizza Hut logo on your nail!!


PROCEDURE :

Step 1  : Apply a base coat to protect your nails and prevent them from staining.

Step 2  : Apply 2 coats of a red nail polish

Step 3  : With black nail polish or black acrylic paint, paint the hat shaped design. I used the pic given below as a giude.


Step 4  : finish it off with a top coat to seal in your design :)


ANGRY BIRDS NAIL ART

This is one of my most favourite nail art designs i've ever done!!


Typing a tutorial for this design is difficult... so I'll just be uploading the pics :)


Hope you like it !!


Here are the pictures I used as a guide :